

VMWare installation & EVE NG Setup step by step for Multi Vendors Devices
As for every IP Network Engineer
readiness of the simulator especially the multi-vendors environment, EVE-NG is
a big headache. But honestly, this is very simple and only needs a few minutes
to focus. Highly request that Please follow the exact steps that I will do below.
With the one-time setup & you will enjoy lab simulations always.
First of all, prepare & download the
below-mentioned software, click on downloading link if you don’t have already
it, simply search on Google or comment your email below I will share it with
you.
- ØVMWare Workstation version 16. x (search on Google, free trial available)
- ØDownload EVE-NG
- Ø FTP, file transfer software, WinSCP, or FileZilla
- ØDownload
the Image you need like Cisco, Huawei, Palo Alto, Fortinet, or any other
vendors (if you don’t have click on contact us I will share it with you).
I have downloaded below software’s
VMware 16.1.0, EVE-NG 5.0.1-13 & Palo Alto firewall & Cisco Routers
image

Now let’s do the
Installation Part
Step-1:
· VMWare installation is very easy to double
click & next-next… –Finish
Step-2:
Open VMware go-to File then open –
upload EVE NG open virtualization format file then import, Wait for a few
minutes it will take time.


Now click on upgrade this virtual
machine then click next

Select Hardware compatibility
Workstation 16.x then next

Default create new clone is select but
change to Alter this virtual machine as below & finally click on finish
& close.


By default, resources are allocated
like RAM, CPU & HDD etc. as it assigned 8 processors as in Core i7 we have
total 8 processors click on Edit virtual machine & update this as per your
laptop specification

As in my laptop 16 GB Ram I assign
10GB RAM & 4 processors,
The important point is to add one new
adapter as well click on the adapter option then add & finish

The important point is to add one new
adapter as well click on the adapter option then add & finish, same as below

Now click the first Adapter (Bridged Automatic)
& change its mode to NAT

And for the second Adapter 2, click on custom, select VMnet1(Host-only), and click ok.

The Above Adapter setting is very very
important, one adapter is for Internet connectivity & other is for
accessing devices like Firewall GUI through a local browser.
Now click on power on this machine
& wait a few minutes

During power up, it will assign one IP
address through DCHP EVE-NG

Drag your mouse to the black screen
& click then enter from the keyboard, put username : root & password is eve then enter

Next it will show prompt for the root
password, now enter same password eve then confirm again eve.


Click enter

Click enter

Now Next step is a very important point take care press
down arrow key on the keyboard and press the space bar on the keyboard to select static, by default dhcp is selected (* steric sing can see )
Down arrow key
then Space

Enter then assign management IP address, I am giving 192.168.23.90 you can assign any IP address

Now subnet mask 255.255.255.0

Now assign the gateway IP address, the
first IP address of the subnet is allocated for VMware's own function not assign 192.168.23.1, Please assign 192.168.23.2 or the second IP of your subnet.

For primary DNS same ip as Gateway 192.168.23.2 for
secondary no need just enter


No need NTP just enter
Next, enter direct connection is ok, it will boot
automatically get a static IP address


We can login with root & eve
(username & password)
Till here EVE-NG installation is completed Now access through Web
The last step is to configure ip address on
Adapter VMnet8 from the same subnet we configure on EVE-NG then it will be pingable
from your laptop


EVE-NG 192.168.23.90 ip should be
pingable from laptop cmd.

The final stage is now lets access
through WEB Browser

It has been accessible write username
admin not root remember that & the password is eve


Now we can create a folder or lab , as I am creating a lab directly click on
below option & give name


GUI interface of EV-NG accessed

Now right click & click on node
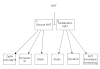
you can see multi vendors devices are supported


But all devices are in grey color which means no image uploaded & not active, for this we need to upload the image(version)
to EVE-NG for each device then it will work.
For example, I will upload Cisco IOS
& Palo Alto Firewall images through the File transfer software WinSCP you can upload
through FileZilla as well.
Below are the steps to upload an image to
EVE-NG through Win-SCP
I have downloaded & install WinSCP

Put EVE-NG ip address, Protocol SFTP
& username/password is root/eve then click login

For the first time, it will ask for an update the key click on update

You have accessed EVE-NG shell

Double Click on the up arrow key on the right
side it will go to the root directory

Now go to opt then unetlab then


Then addons

Then qemu

Now upload your required image from your local
laptop but remember that the qcow file will be in one folder means not like the folder in another folder(Nested
folder) its not working for example I am uploading Palo Alto firewall
click on upload then ok


Now fix the permission through EVE-NG
Cli below two commands then access firewall

Now again come to EVE GUI ,you can see
Palo Alto firewall color change to means its active

Before accessing the devices cli
install the eve-ng-Win-client-Pack (simple installation double click next-next…)
& reboot your laptop this is
important,

Now Right click on firewall start then double click cli is accessible

Finally Firewall CLI accessible below

Once you did these steps then same for
all vendor's devices like Fortinet, Huawei, Windows OS, AD etc .
For Cisco switch & router need to
upload in the below directory iol not qemo
/opt/unetlab/addons/iol/bin
if still you have any confusion Click on the contact us form & send me an email or any disk I will support you remotely.
Keep Learning,
Keep Reading, Keep Growing. IT & IP is the future.
Q&A
How to install EVE-NG
EVE NG images for multi-vendors
EVE NG default password & username
How to install VMWare installation
EVE NG for Cisco
EVE for Huawei
EVE NG Palo Alto
EVE NG Fortinet etc etc


3 Comments
This comment has been removed by the author.
ReplyDeletePlease share the software with me, email: jut987456321@hotmail.com
ReplyDeleteya hice rtodo pero no me inicia el palo alto en el eve-ng
ReplyDelete